Wednesday, June 26, 2013

Correlated Subquery

A correlated subquery is a type of nested subquery that uses columns from the outer query in its WHERE clause.

For example, a query to list employees whose salary is more than their department’s average:

SQL> select oe.deptno, oe.ename, oe.sal
  2  from   emp oe
  3  where  sal >
  4            -- Correlated subquery starts
  5               (select avg(ie.sal) from emp ie
  6                where ie.deptno = oe.deptno)
  7            -- Correlated subquery ends
  8  order by oe.deptno;

    DEPTNO ENAME             SAL
---------- ---------- ----------
        10 KING             5000
        20 JONES            2975
        20 SCOTT            3000
        20 FORD             3000
        30 ALLEN            1600
        30 BLAKE            2850

6 rows selected.


In this query, the inner query is a correlated subquery: it references department number of the outer query. The outer query uses the correlated subquery to calculate the average salary for each department.
While a simple subquery is evaluated only once for each table, a correlated subquery is evaluated once for each row.

The outer query (also called parent query) can be a SELECT, UPDATE or DELETE.

Syntax of the Correlated Subquery
SELECT

SELECT select_list
    FROM table1 t_alias1
    WHERE expr operator
        (SELECT column_list
            FROM table2 t_alias2
            WHERE t_alias1.column
               operator t_alias2.column);


UPDATE
UPDATE table1 t_alias1
    SET column =
        (SELECT expr
            FROM table2 t_alias2
            WHERE t_alias1.column = t_alias2.column);


DELETE
DELETE FROM table1 t_alias1
    WHERE column operator
        (SELECT expr
            FROM table2 t_alias2
            WHERE t_alias1.column = t_alias2.column);

Monday, June 24, 2013

Grouping in BI/ XML Publisher


.

Sunday, June 23, 2013

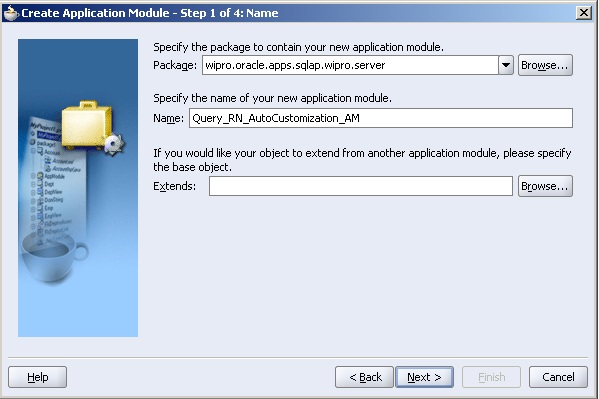
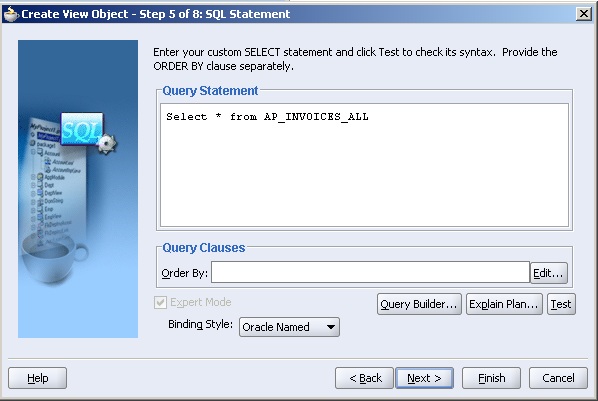
Search Page Using Auto Customization Criteria


Result Based Search Page in OAF...


Monday, March 11, 2013

Im back...............

Hello Friends....
Im back.....

Friday, October 9, 2009

Account Payables -> Account Payables Flow:

Account Payables -> Account Payables Flow:
PO -> Receipt -> AP -> GL


Invoice -> Payments-> Move Transactions from AP to GLIn AP there are 2 Thumb rules.

• Without supplier there is no invoice.

• Without invoice there is no payment.


Invoice Types:

1. Standard: We will make all the payments based on the standard invoice. It will have the information of Invoice Number, Invoice Date, Invoice Amount, and Currency.

2. Credit Memo: We will create credit memo invoice whenever supplier is giving the discount and it will be adjusted in standard invoice. It is always negative amount.

3. Debit Memo: Sometimes Company will deduct some amount from the invoice amount. This will be adjusted in standard invoice. It is always negative amount.

4. With-Holding TAX: This type of invoice will be created to make the invoice tax to the Govt. on behalf of supplier.

5. Pre-Payment: If we want to make some payments to the supplier in advance then we create the Pre-Payment invoice.

6. PO Default: If we want to make the invoice as per the PO then we create PO default. We will give Po Number. System will pick up the complete PO information.

7. Mixed: Includes both positive and negative amount. We can match this invoice with PO’s and other invoices.

8. Expense Report: This will be applicable for the employees who are working in the Company where payables and internet expense and project account. Expense will be included.

9. Recurring invoice: We can enter invoice for periodic expense for which we may not receive. Invoice from supplier. To create a Recurring invoice first we will take template.

As per that we will create the invoice.Once the invoice is successfully completed, we can go for payments. It is of 3 types.


Manual Payment: Here we will be mentioning the Invoice Number, Bank Account, and Document Number, Payment Date and Currency.


Refund payment: This is used for Employee expenses and for adjusting the Supplier account,

Quick payment: In this payment, system will automatically generate checks. To print Checks there will be a concurrent program for each check format.Once the payment was done, we will move all the transactions to GL.


Suppliers:

Set up suppliers in the Suppliers window to record information about individuals and companies from whom you purchase goods and services. You can also enter employees whom you reimburse for expense reports. When you enter a supplier that does business from multiple locations, you store supplier information only once, and enter supplier sites for each location. You can designate supplier sites as pay sites, purchasing sites, RFQ only sites, or procurement card sites. For example, for a single supplier, you can buy from several different sites and send payments to several different sites. Most supplier information automatically defaults to all supplier sites to facilitate supplier site entry. However, you can override these defaults and have unique information for each site. The system uses information you enter for suppliers and supplier sites to enter default values when you later enter transactions for a supplier site. Most information you enter in the Suppliers window is used only to enter defaults in the Supplier Sites window. When the system enters that information in a later transaction, it only uses supplier site information as a default, even if the supplier site value is null and the supplier has a value. If you update information at the supplier level, existing supplier sites are not updated. When you enter a supplier, you can also record information for your own reference, such as names of contacts or the customer number your supplier has assigned to you.


Invoices:

Invoice Type (LOV): The type of invoice. Standard and Credit are the only invoice types you can enter in this window. If you do not enter a value for this field then a value will be assigned during import based on the amount of the invoice.


Standard: A trade invoice you receive from a supplier. The amount of a Standard invoice must be zero or greater.


Credit: Credit Memo. A negative amount invoice you receive from a supplier representing a credit for goods or services purchased. Note that in the Invoice Gateway you can match a credit memo to a purchase order to perform a price correction, but you cannot match a credit memo to an invoice. If you want to match to an invoice, then use the Invoice Workbench.


Debit Memo: Negative amount invoice created by you and sent to a supplier to notify the supplier of a credit you are recording. Usually send with a note explaining the debit memo. Purchase Order Matched Invoices: You can match Payables invoices to purchase orders to ensure that you pay only for the goods that you have ordered, or you can match to purchase order receipts to ensure that you pay only for goods that you have received. Purchase order matched invoices are invoices that you match to any of the following:

• Purchase order shipments

• Purchase order receipts

• Purchase order receipt lines

• Purchase order distributions

Foreign Currency Invoices: When you enter an invoice in a currency other than your functional currency, Payables uses an exchange rate to convert the invoice and invoice distributions into your functional currency for creating journal entries. You define your functional currency during setup for your set of books.

Mixed Invoices: Mixed Invoices are invoices or credit/debit memos for which you can perform both positive and negative matching to purchase orders and to other invoices. For example, you can enter an invoice for –$100 with Invoice Type Mixed. You can match to an invoice for $–200, and match to a purchase order for $100.


Prepayments:A prepayment is a type of invoice you enter to make an advance payment to a supplier or employee. For example, you need to pay a deposit on a lease, or pay an employee an advance for travel expenses. You can later apply the prepayment to one or more invoices or expense reports you receive from the supplier or employee to offset the amount paid to them. The supplier might send an invoice that references a prepayment. The supplier has reduced the invoice amount by the amount of the prepayment and associated tax. You can use the Prepayment on Invoice feature to enter the invoice.

You can enter two types of prepayments:

Temporary prepayments can be applied to invoices or expense reports you receive. For example, you use a Temporary prepayment to pay a hotel a catering deposit. When the hotel’s invoice arrives, apply the prepayment to the invoice to reduce the invoice amount you pay.

Permanent prepayments cannot be applied to invoices. For example you use a Permanent prepayment to pay a lease deposit for which you do not expect to be invoiced.

2–way matching: The process of verifying that purchase order and invoice information matches within accepted tolerance levels. Payables use the following criteria to verify two–way matching: Invoice price <- Order price Quantity billed <- Quantity ordered

3–way matching: The process of verifying that purchase order, invoice, and receiving information matches within accepted tolerance levels. Payables use the following criteria to verify three–way matching: Invoice price <- Purchase Order price, Quantity billed <- Quantity ordered, Quantity billed <- Quantity received.

4–way matching: The process of verifying that purchase order, invoice, and receiving information matches within accepted tolerance levels. Payables use the following criteria to verify four–way matching:

Invoice price <- Order price

Quantity billed <- Quantity ordered

Quantity billed <- Quantity received

Quantity billed <- Quantity accepted


FOB (Free On Board): The point or location where the ownership title of goods is transferred from the seller to the buyer. This indicates that delivery of a shipment will be made on board or into a carrier by the shipper without charge, and is usually followed by a shipping point or destination (e.g. ’FOB Our warehouse in New York’). The FOB code is currently available only for reference purposes. Revenue and cost recognition is not currently determined by the value entered in this field. (Receivables Lookup)


Purge : An Oracle Receivables Process, where you identify a group of records for Receivables to delete from the database. Receivables purge each record and its related records. Receivables maintain summary data for each record it purges.

What are Types of Documents in Oracle Applications :

AIM (Application Implementation Maintenance) developed by Oracle Applications.
MD050 - Module Design - By Functional Consultants
MD070 - Technical Document Design - By Technical Consultants
MD020 - Testing Document Design - By Functional Consultants
MD0120 - Migration/ User Training - By Technical Consultants
CV040 - Conversion of Functional Document - By Functional Consultants
CV060 - Conversion of Technical Document - By Technical Consultants
Note: Conversion means, moving data from old Database to new Database.
Example: Conversion from IBM to ORA APPS

Which are Concurrent Executables in Oracle Apps? How many Types of Concurrent Programs?

There are 11 types of executables

1. Reports - .rdf

2. SQL * Plus - .SQL

3. PL/SQL Procedures - .pkb / .pks

4. SQL * Loader file - .ctl

5. Java Structured Procedure - .java / .class

6. Host(UNIX) - .sb

7. Spawned

8. Immediate

9. Java Concurrent Program

10. Request set stage Function

11. Multi-Language Function.

Note: Once moving are programs to Oracle Applications they will be convert to “CONCURRENT PROGRAM”.

Concurrent Process: Simultaneously executes program running in the background with online operations to fully utilize the hardware capacity.

Concurrent Program: Can write a program that runs as a concurrent process. Use concurrent program for long running, data-intensive tasks.

Major features: On-line requests
Automatic scheduling
Concurrent processing
Online request review
Concurrent manager
Simultaneous queuing

On-line Request: You and end-user can submit requests from forms to start any concurrent program.

Automatic Scheduling: Oracle Application Object Library automatically schedules requests based on when they were submitted, their priority, and their compatibility with programs those are already running.

Concurrent Manager: Cocurrent Managers are components of concurrent processing that monitors and run, time-consuming, non-interactive tasks without tying up your terminal.

Concurrent manager processes requests and does the work in the background, giving the ability to run multiple tasks simultaneously.

Internal Concurrent Manager starts up, verifies the status of, resets, and shuts down the individual managers.

Simultaneous Queuing: It lets requests wait in many queues at once to ensure that the first available concurrent manager starts the request.

Concurrent Program Executable: Links an execution file and the method used to execute it with defined concurrent program. This mathod may be a program written in standard language, a reporting tool, or an operating system language.

A Concurrent program execution file is an operating system file or database stored procedure.

Concurrent Program Definition: A concurrent program is an instance of an execution file, along with parameter definitions and incompatibilities. Concurrent programs use concurrent program executables to locate the correct execution file.

Concurrent Program written in: Oracle reports, PL/SQL package procedures, SQL *Loader, SQL *Plus, Host script.

Parent request: A parent request is a concurrent request that submits another concurrent request.

Child request: A child request is a concurrent request submitted by another concurrent request.

Concurrent Manager: Concurrent Managers are components of Concurrent Processing that monitor and run, time-consuming,non-interactive tasks without tying up terminal.

Whenever request submits to run a task, a concurrent manager processes that request and does the work in background, giving the ability to run multiple tasks simultaneously.

What is SQL* Loader?

SQL*loader is one of the Oracle tool which will be used to transfer the data from Flat-File to oracle Database table.

We can find the fallowing files in SQL*loader
1. Flat or Data File
2. Control File
3. Bad File
4. Discard File
5. Log File


Flat Or Data File: This file contains the records in a special format; these records will be fetching for other legacy. The extension of these files might be .dat, .txt, or .csv (comma separated view).


Control File: This is SQL loader execution file, which will be used to transfer the date from file to table. In side of these control file, we will mention the Data file path, table name, column mapping. The extension of control file is .ctl

Control File Creation:

Load data
INFILE ‘Data File Path’
INSERT INTO ‘Table Name’
FIELD TERMINATED BY ‘,’
WHERE deptno = 10
TRAILING NULL COLS
(column1 , empno
column2, ename
column3, deptno)


Once we develop the control file we will execute this by using fallowing command
C:\> sqlldr user/passward @ Database Control = name of control file (with extension .ctl)
This command will start the control file execution, and it will try to read the data and inserting into table. After completion of this execution, automatically three files will gets created
Bad file
Discard file
Log file


Bad File: Bad file contain the records, which are rejected by the SQL*loader. SQL*loader will reject the records, when ever the Flat file format is not correct or if any internal error occurs it will rejected. The extension of bad file is .bad


Discard File: Discard file contains the records which are rejected by the control file, control file reject the records, if record is not satisfying the conditions, which we have mentioned inside of control files the extension of discard file is .dis


Logfile: It contains the complete info of the process, like no of records successfully loaded in to the table
No of records successfully loaded in to the bad file & discard file.
And where the bad, discard file gets created and time taken to complete the process.
Taking the complete log.
SQL* Loader Modes:
INSERT
APPEND
REPLACE
We can replaced the data in to the table by using any one of the allowing method

INSERT: When we are using this statement, table should be empty. SQL * loader will insert the new data form the file.
APPEND: This mode will be use to attach the new record to the existing records.
REPLACE: This will replace the existing records with new records.
C:\> sqlldr userid/passward@Database control=text1.ctl path=direct

SQL* Loader Paths: We can execution SQL* loader in two paths or nodes
Direct
Conventional

By default SQL*loader will be running in conventional mode, if we want to run in direct mode will use the fallowing syntax
C:\> sqlldr userid/passward@Database control=text1.ctl path=direct
Direct mode will disable the table and column constrains and it will insert the data.
Conventional path will check every constrains, if it is satisfied it will insert the record
Conventional path is just like ‘insert statement’
SQL Commands Limitations:
to_date, to_char, upper, lower, Initcap, string, decode, nvl
when clause
sequence_name.next_value, Ref-Cursor
sysdate, ltrim, rtrim, constant

What is Value Sets? What are Types Of Value Sets?

Oracle Application Object Library uses values; value sets and validation tables as important components of key FLEXFIELDs, descriptive FLEXFIELDs, and Standard Request Submission. This section helps you understand, use and change values, value sets, and validation tables. When you first define your FLEXFIELDs, you choose how many segments you want to use and what order you want them to appear. You also choose how you want to validate each of your segments. The decisions you make affect how you define your value sets and your values. You define your value sets first, either before or while you define your FLEXFIELD segment structures. You typically define your individual values only after your FLEXFIELD has been completely defined (and frozen and compiled). Depending on what type of value set you use, you may not need to predefine individual values at all before you can use your FLEXFIELD.
You can share value sets among segments in different FLEXFIELDs, segments in different structures of the same FLEXFIELD, and even segments within the same FLEXFIELD structure. You can share value sets across key and descriptive FLEXFIELDs. You can also use value sets for report parameters for your reports that use the Standard Request Submission feature.
Because the conditions you specify for your value sets determine what values you can use with them, you should plan both your values and your value sets at the same time. For example, if your values are 01, 02 instead of 1, 2, you would define the value set with Right–Justify Zero–fill set to Yes.
Value set is nothing but List of Values with validations. We can use the Value Sets when ever the Concurrent Program has parameters and while defining the Flex Fields. We have to attach the value sets to the Concurrent Program. Validations are depending on Client Requirement.

Value sets are of 8 types.
There are several validation types that affect the way users enter and use segment or parameter values:
1. None (not validated at all)
2. Independent
3. Dependent
4. Table
5. Special (advanced)
6. Pair (advanced)
7. Translatable Independent
8. Translatable Dependent


You cannot change the validation type of an existing value set, since your changes affect all FLEXFIELDs and report parameters that use the same value set.


None: You use a None type value set when you want to allow users to enter any value so long as that value meets the value set formatting rules. That is, the value must not exceed the maximum length you define for your value set, and it must meet any format requirements for that value set. For example, if the value set does not allow alphabetic characters, your user could not enter the value ABC, but could enter the value 456 (for a value set with maximum length of three). The values of the segment using this value set are not otherwise validated, and they do not have descriptions. Because a NONE value set is not validated, a segment that uses this value set does not provide a list of values for your users. A segment that uses this value set (that is, a non–validated segment) cannot use FLEXFIELD value security rules to restrict the values a user can enter.

Independent : An Independent value set provides a predefined list of values for a segment. These values can have an associated description. For example, the value 01 could have a description of ‘Company 01’. The meaning of a value in this value set does not depend on the value of any other segment. Independent values are stored in an Oracle Application Object Library table. You define independent values using an Oracle Applications window, Segment Values.


Table: A table–validated value set provides a predefined list of values like an independent set, but its values are stored in an application table. You define which table you want to use, along with a WHERE cause to limit the values you want to use for your set. Typically, you use a table–validated set when you have a table whose values are already maintained in an application table (for example, a table of vendor names maintained by a Define Vendors form). Table validation also provides some advanced features such as allowing a segment to depend upon multiple prior segments in the same structure.


Dependent : A dependent value set is similar to an independent value set, except that the available values in the list and the meaning of a given value depend on which independent value was selected in a prior segment of the FLEXFIELD structure. You can think of a dependent value set as a collection of little value sets, with one little set for each independent value in the corresponding independent value set. You must define your independent value set before you define the dependent value set that depends on it. You define dependent values in the Segment Values windows, and your values are stored in an Oracle Application Object Library table.


Special and Pair Value Sets:
Special and pair value sets provide a mechanism to allow a”FLEXFIELD–within–a–FLEXFIELD”. These value sets are primarily used for Standard Request Submission parameters. You do not generally use these value sets for normal FLEXFIELD segments. Special and Pair value sets use special validation routines you define. For example, you can define validation routines to provide another FLEXFIELD as a value set for a single segment or to provide a range FLEXFIELD as a value set for a pair of segments.


Translatable Independent and Translatable Dependent :
A Translatable Independent value set is similar to Independent value set in that it provides a predefined list of values for a segment. However, a translated value can be used. A Translatable Dependent value set is similar to Dependent value set in that the available values in the list and the meaning of a given value depend on which independent value was selected in a prior segment of the FLEXFIELD structure. However, a translated value can be used. FLEXFIELD Value Security cannot be used with Translatable Independent or Translatable Dependent value sets. For format validation, translatable value sets must use the format type Char. The maximum size must be no greater than 150. The Number Only option and the Right–justify and Zero–Fill Numbers option cannot be used with translatable value sets. Range FLEXFIELDs cannot use Translatable Independent or Translatable Dependent value sets.

Navigation Path for Value Set Creation?

Navigation Path for Value Set Creation:
Application-> Validation -> Set.
Once we create Independent & Dependent valueset then we can attach values to the valueset by using the following Navigation.
Application ->
-> Validation
-> Values (To create values for value set)
NOTE: Once we attach any value to Independent & Dependent we can’t delete that value, but we can disable that value. Duplicate values are not allowed in list of values.

Develop a Report using Query and by creating valueset :
Select USER_ID, USERNAME From FND_USER Where
USER_ID Between :X AND :Y
:$FLEX$ - It is One of the Oracle applications Key word which we use to get the prevents parameter value in current list of values “WHERE Clause”. We can be use Table Values in the “Where Clause Box”.
Query Using: $FLEX$
Select
VENDOR_SITE_ID
From
PO_VENDOR_SITE_ALL
Where
VENODR_ID = :$FLEX$.VEN_TABLE
Note: We can give Where Clause Condition in creation of Second Value Set.
Practical:
Query:
Select *
From ORF_ORGANIZATION_DEFINATIONS
Where ORGANIZATION_ID = :P_ORG_ID
And BUSINESS_GROUP_ID = :P_BUSINESS_GROUP_ID

In Where Clause write the statement as
Where
BUSINESS_GROUP_ID = :$FLEX$.BUISINESS_GROUP

Range:
When ever we have to restrict the user with in the given values we use Range. For example when ever our parameter is having “From Date and To Date” we have to use Range option to restrict the user to enter the values between Low and High.
Note:
Pre defined value set for date is “FND_DATE” and its default format is “DD-MON-YY”.Alias name is mandatory when we are specifying ‘:$FLEX$’ and Column Name in ‘Additional Column’.

What are Steps for Report Development in Apps?

Steps for Report Development....

1. Develop the report as per client requirement using the Report-6i tool.
2. Move the report (.rdf) file from local machine to respective path in the server. If client have the CUST_TOP then move into Cust_Top else move it to the related Standard Top.Custom Top - CUST_TOP/ 11.5.0/ Report/ US/ .rdf Standard Top - PO_TOP/ 11.5.0/ Report/ US/ .rdf (For PO report)
3. Create “Executable” for that report (After log on to Oracle Applications and Select “System Administrator” responsibility)
4. Create “Concurrent Program” and attach Executable to Conc. Prgm. and define Parameters and Incompatibles if any.Concurrent Program: It is an instance of the executable file along with parameters & incompatible.
5. Create “Request Group” and attach Conc. Prgm. to Request Group.Request Group is nothing but a collection of Conc. Prgms.
6. Create “Responsibility” and attach the Request Group to Responsibility.
7. Create “User” attach Responsibility to User” so that the user can run this Conc. Prgm. form the “SRS Window” (Standard Request Submission).Note: All the Conc. Prgms. should run from the SRS window (Even if we run from Back-End)By default the user has the rights of System Administrator or Application Developer responsibilities
Every form in Oracle Applications contains 3-Types of Fields.1. Yellow color – Mandatory2. Green Color – Read-Only3. White Color – Optional
User Creation:Open IE and type path of Oracle Application in address bar enter User Name and PasswordUser Name: OPERATIONSPassword: WELCOMESelect System Administrator Responsibility
Select Security / User / DefineGive the required information and Save.
Switch the user to newly created User.Note: When we create any User, the User stored at FND_USER. We can find throughHelp >Record-History >FND_USER
Column Name: To find all column names: Help >Diagnostics >ExamineWHO Columns: 4 types of who columns for each table in Oracle ApplicationsCreated ByCreation DateUpdated ByUpdated Date

How to Develope Report with out Parameters?

How to Develope Report with out Parameters?

Developing Report with out Parameters:
To develop any report in Report-6i tool, select “Build a new Report Manually” option.

Select SQL query object and write the Select Statement.

It will ask the Database connection. Provide User id, Password and Connection string (DB host) – APPS/APPS@ORCL.

Create Layout manually according to the given query.
Compile the report with out errors.
Save the report in Local Machine.

Copy the Report and paste it in respective path (Respective TOP).
Path - APPS/ D / Oracle / PROD_APPL / PO / 11.5.0 / Reports / US / .rdf
Implementing Report in Oracle Applications:
Connect to APPS Server.
Create Executable for created report.
Navigation: System Administrator
->Responsibility
-> Concurrent Program
->Executable
Mandatory Fields in this window are: Executable, Short Name, Application, Execution File Name
Note: From here we can refer the Report (Executable) with Short Name;

Create the Concurrent Program for this Executable.
Navigation: System Administrator
->Concurrent
-> Program
-> Define
Give the required information like Program, Short Name, Application, Executable (Name, Method), Output (Format…) etc.

Create Request Group.
Navigation: Security
-> Responsibility
-> Request
Here we have to give information like Group (RG Name), Application (E.g. Oracle Purchasing)
Add the Concurrent Program as Request to Request Group which is created.

Create Responsibility.
Navigation: Security
-> Responsibility
->Define
While creating Responsibility we need to mention three things.
· Data Group – Required. It is nothing but Oracle User ID
· Menu – Required. Collection of Forms, which are related to specific business
· Request Group – Optional. Collection of Concurrent Programs and Reports which are related to specific business
Note: If we create Responsibility with Request Group, no need to add RG again to Responsibility.

Create User.
Navigation: Security
-> User
-> Define
Attach the Responsibility to User.
Run the Concurrent Program from SRS window.
Note: All the Concurrent Programs should run from SRS (Standard Request Submission) window.


How to go to SRS window:
Select relative Responsibility (FILE à Switch Responsibility)
Go to View a Requests a Submit New Request a Select the Report a Click Submit
After Submission it will give Request ID. Here 2 fields View Report, View LOG File will give information of the Resultant file created by Concurrent Program.
Note:
· We can find all O/P and LOG files by the following query from the Database.
Select LOGFILE_NAME, OUTFILE_NAME
From FND_CONCURRENT_REQUESTS
Where REQUEST_ID = ‘XXX’;
· We can’t delete Concurrent Program but we can disable it.
· Columns and Rows fields will be used to mention the O/P file Columns and Rows.
· Save, This Check Box can use to save the O/P file in the server.
· Use in SRS, if we uncheck this Check Box, then this we can’t run this program from SRS window.
· Copy To, We can create new for the existing Report.
Scheduling the Concurrent Program:
We can schedule the Concurrent Program in 4 ways.
· As Soon As Possible (Default)
· Once
· Periodically
· On Specific Days
We can save the Schedule and can apply this Schedule to any other Concurrent Program.
We can run with a message in the LOG File by using SRW.MESSAGE() function.
Develop Report with Parameters:
There are 2 types of Parameters.
1. Bind parameters
2. Lexical Parameters
Bind Parameter: Bind parameter is a variable which we will use to pass the value. We should use ‘:’ before any variable in a query.
Lexical parameter: Lexical parameter is a parameter which we will use inside of a query. By using this parameter we can replace any clause or any where inside of the statement like Select, From, Where, Order By clauses.
If our report has parameters then we should define parameters from the report while creating Concurrent Program. While defining the parameters we should mention following fields.
It is a list of values with validations. We have to use value set for a parameter. By using this we can restrict the invalid entries by the end-user.


Prompt: This field will use to display the string while submitting the Concurrent Program in the Parameter Form.


Token: It is a field which is use to give the link between Concurrent Program Parameter and report Bind Variable. When we create Bind Variables in report those may or may not be in the same sequence. So we can map these bind Variable with the Token fields.
Required Check Box: If we uncheck this, the parameter is optional, otherwise it is mandatory.
Default Types: There are 4 default types.
· Constant
· Profile
· SQL Statement
· Segment
Constant: We can select this default type if we have to pass the constant value to parameter of the Concurrent Program. We can mention the value in the “Default Value Field” at right side.
Profile:
SQL Statement: If we have to set the default value as SQL Query result set then we should select default value type is SQL Statement and we have to enter the SQL Query in the ”Default Value field”.
Segment: If we want to get previous parameter value as default to the next parameter, we have to select the default type as Segment and we have to give the previous parameter name in “Default Value Field”.
Note: The query which we have to enter in default value field should give only one value
Using the format trigger we can hide or display the “Layout Object”. This layout object can be a Field or Text.
We can display input parameter values in the first page (or any other pages) by using Bind Variables.

Standards for Report Developments in Oracler Apps

What Are Standards for Report Developments in Oracler Apps?


Oracle Applications Standards for New Report Developments...
For developing a Report in Oracle Applications we should follow three standards.
1. Creation of Bind Variable - P_CONC_REQUEST_ID:
We must create a Bind Variable called “P_CONC_REQUEST_ID” (We can’t change this name. It is standard name.). If we run Conc. Prgm. from SRS window, it will give a Request ID. It will get store in ‘P_CONC_REQUEST_ID” automatically. This Bind Variable is useful, when we call another Conc. Prgm. with in a Conc. Prgm.


2. FND SRWINIT in Before Report Trigger:
We call the USER_EXIT (‘FND SRWINIT’) form Before Report Trigger. Syntax is
SRW.USER_EXXIT(‘FND SRWINIT’):
This USER_EXIT is initializing the user profiles in the report trigger i.e., before getting the date from the Database.
Note:
While executing the Conc. Prgm. the system allocate memory for the program which contains all details of user. In above syntax,
SRW.USER_EXIT refers to D2K and purpose of this is, when we want to transfer the control from execution of report to other 3rd generation language and again transfer the control to report execution.
FND SRWINIT refers to Oracle Applications. Purpose of this is to get the “User Profile”.

3. FND SRWEXIT in After Report Trigger:
We call the USER_EXIT (‘FND SRWEXIT’) form After Report Trigger. Syntax is
SRW.USER_EXXIT (‘FND SRWEXIT’):
This USER_EXIT is frees the memory which is occupied by user profiles.

Sunday, October 4, 2009

Oracle Apps Installation

1) Oracle Applications 11i (EBS - 11i) Installation on windows.

2) Oracle Applications R12 (EBS - R12) installation on windows.

Oracle Apps 11i Installation on Windows

1) Prerequisites

2) Apps Installation on Windows Server 2003 or Windows XP

Prerequisites for EBS - 11i installation

1) Computer Name and Domain setting

2) Create a loopback adapter

3) Install MKS Tool Kit

4) Install Visual Studio 6.0

Create a Loopback adapter

1) Open Control panel and open Add hardware wizard
2) Click on Yes,I have already connected the hardware and click next.
3) scroll down and click on click on add a hardware and click next
4) Click on Install the hardware that I manually select from a list and click next
5) Select Network adapter from list and click next.
6) Click on Microsoft loopback adapter and click next to finish.

Computer name and Domain setting.

1) Open Control pannel. Double Click System.
2) Click on computer name tab,click on change button to chage the computer name and domain.
3) Give computer name and click more button to change domain.give the domain name in
Domain_Name.com format and click ok
4) Restart the computer for the changes to take effect.

Oracle EBS - 11i Installation on Windows NT

Go the Stage drive and double click the rapidwiz.exe file in the Stage\startCD\Disk1\rapidwiz directory. The below window appears. Click next button to continue.


click next button.


If you have configuration file, select Yes and specify the file name.


In a single-node installation, the RDBMS, the core AD directories and product
directories, and the concurrent processing, forms, and Web servers are installed on one
node under a common APPL_TOP.
In a multi-node installation, the RDBMS and the concurrent processing server, forms
server, and Web server can be distributed across multiple nodes.
To set up a single-node system, click Single-node. Click Next to continue


There are two types of databases
1)A Vision Demo database is used for demonstration or training purposes. It contains
a fully configured Oracle Applications system that has been implemented and
populated with a set of transactions for a fictitious company.
2)A fresh database is fully configured and ready for a new implementation.


Database(DB_TOP) installation directory. Give the directory it should have 67GB of free space for DB.


Give the Unix or MKS tool kit installation Directory.
Give the VC++ directory
Give the Base installation directory(APPL_TOP). It should have 28GB of free space.


To save the configuration click browse and give the file name and path.


Click Next.


Pre- requisites check.


Click next.


Click next.


Click Yes.


Installation Progress at step-1


Installation Progress at step-3.


Installation progress at step-4


Installation Progress at step-5.


Post Installation Check.


Click Finish.


Open Internet Explorer.
Give the path http://.:8000
here Computer Name is : apps
domain Name : ora.com
Port Number : 8000
So i gave http://apps.ora.com:8000.
Click apps log on links in the browser page.


Give User name and password
User Name : Operations
Password : Welcome.

Note: User name and Password are case in-sensitive.